
Guerrilla warfare thrives on one principle: never meet strength with strength. Victory belongs to those who master timing, terrain, and deception. Among the many tools in the irregular fighter’s arsenal, none delivers greater impact than the ambush. It is the most distilled expression of asymmetric warfare, swift, precise, and psychologically devastating.
A well-executed ambush does more than destroy vehicles or kill soldiers. It breaks trust within a unit, erodes confidence in leadership, and breeds an enduring sense of vulnerability. When troops fear every turn in the road, every rustle in the brush, they stop acting, and start reacting. That is the true power of the ambush.
This article examines how guerrilla ambush tactics shape irregular warfare. It traces their tactical function, strategic value, and psychological effects through history and into the modern age of drones and sensors. The lessons remain unchanged: the ambush punishes complacency and rewards preparation. It is as much a contest of will and intellect as of firepower.
Since this article was first published in December 2024, drone-enabled ambush tactics have continued to evolve in the Ukraine theatre, with first-person-view (FPV) drones increasingly serving as both reconnaissance and strike elements in convoy interdiction operations. NATO’s 2025 doctrinal updates have further emphasized counter-ambush integration of electronic warfare and persistent ISR across allied formations. This article has been updated with expanded modern case studies and additional internal references.
See also: Sabotage in Resistance Movements → · The Guerrilla Raid →
The Role of the Ambush in Irregular Warfare
Tactical Purpose
An ambush is the purest form of tactical economy. When resources are scarce and the enemy holds the initiative, the ambush restores balance through surprise and terrain mastery. It turns movement itself into vulnerability. Guerrilla units rely on ambushes to harass convoys, isolate small patrols, and drain supply lines without sustaining unacceptable losses.
The purpose is never to win through destruction but to win through exhaustion. Every convoy delayed, every road avoided, every soldier lost to uncertainty accumulates strategic weight. By shaping where the enemy moves and when they feel safe to move, the guerrilla force seizes control of the operational tempo. It is warfare by interruption, a contest of patience rather than force.
Ambushes also allow small units to focus limited firepower where it matters most. In practice, that means striking at command vehicles, communication relays, or logistics convoys. Each attack is designed to ripple beyond the immediate kill zone. A successful ambush creates chaos that forces a larger opponent to divert troops, delay operations, and commit scarce resources to defense.
Doctrinal reference: In FM 3-24 and JP 3-24, the ambush is described as the quintessential guerrilla action — a tactical event with operational consequences when applied systematically. The principle remains the same: surprise, violence, withdrawal. See also the Resistance Operating Concept for how ambushes integrate into broader resistance frameworks.

Strategic and Psychological Value
Ambushes operate in both the physical and psychological domains. Physically, they cut lines of communication and weaken the enemy’s ability to maneuver. Psychologically, they create an environment of dread where every tree line or roadside culvert seems alive with danger. Fear becomes a force multiplier.
For commanders, ambushes impose strategic friction. Resources must shift from offense to protection. Routes change. Convoys require armor and air cover. Soldiers lose initiative and adopt a defensive posture. Over time, this erosion of confidence can reshape entire campaigns.
Mao Zedong viewed ambushes as a long game of erosion, not to destroy armies in the field, but to corrode their will to fight. Vo Nguyen Giap refined this idea in Vietnam, coordinating ambushes across regions to exhaust French and American forces both physically and mentally. Each engagement bled not only men and machines but also time, attention, and morale.
Through the ambush, guerrillas seize control of perception itself. They dictate when an army feels secure and when it does not. Once that fear takes root, the battlefield belongs to them. This principle is further explored in the ARIS framework, which documents how psychological operations amplify the effects of tactical actions across resistance campaigns.
Anatomy of a Successful Guerrilla Ambush
A successful ambush rests on disciplined fieldcraft. It is a sequence of decisions that must line up. Miss one element and the plan collapses. Below are the core elements that make an ambush lethal, followed by how those elements are evolving on the modern battlefield.

Core Elements
1. Intelligence and pattern analysis
Continual observation of enemy routines is the foundation. Record times, formations, escort habits, and logistical cycles. Confirm critical details with at least two independent sources. Human reporting, sensor feeds, and captured documents should validate the same facts. Map likely approaches, fields of fire, and withdrawal corridors. Good preparation replaces guesswork with options.
2. Surprise and timing
Choose the moment when the target is most exposed. Movements at dawn, dusk, or during routine resupply windows present recurring opportunities. Synchronize triggers so effects appear simultaneous to the target. Staggered initiation reveals intent and gives the enemy time to react. Control noise, light, and signature. Discipline in movement preserves surprise.
3. Terrain exploitation
Shape the enemy’s path into a kill zone. Narrow valleys, bridge crossings, and built features that block observation amplify lethality. Natural cover that also provides clear fields of fire is ideal. Manmade features can help when used sparingly; predictable patterns invite countermeasures.
4. Decisive execution and planned withdrawal
Apply focused effects against drivers, radios, and mobility systems to immobilize the target. The firing plan must be synchronized and prioritized. Withdrawal is not optional. A timed exit preserves combat power for future operations and prevents an ambush from becoming a prolonged fight.
5. Command and control discipline
Assign clear roles, triggers, and fail safe signals. Keep the chain of command concise and redundant. Communications discipline limits detection. Use short transmissions, prearranged signals, and simple contingency plans for comms loss.
6. After-action logistics
Plan casualty handling, denial of materiel, and exfiltration before firing the first shot. Safe rally points, medical triage plans, and caches for equipment reduce exposure during withdrawal. An ambush that overlooks the aftermath invites disaster.
Practical Checklist for a Single Ambush Mission
- Confirm target identity and composition with two independent intelligence sources.
- Verify approach and withdrawal routes for all friendly elements.
- Pre-position observation posts at two or three overwatch sites.
- Establish clear trigger conditions and abort criteria.
- Designate withdrawal time and at least one alternate exfil route.
- Prepare casualty collection points and material denial measures.
- Conduct a silent rehearsal on terrain models or a walk-through.
Modern Extensions
Technology changes tools. The logic stays the same.
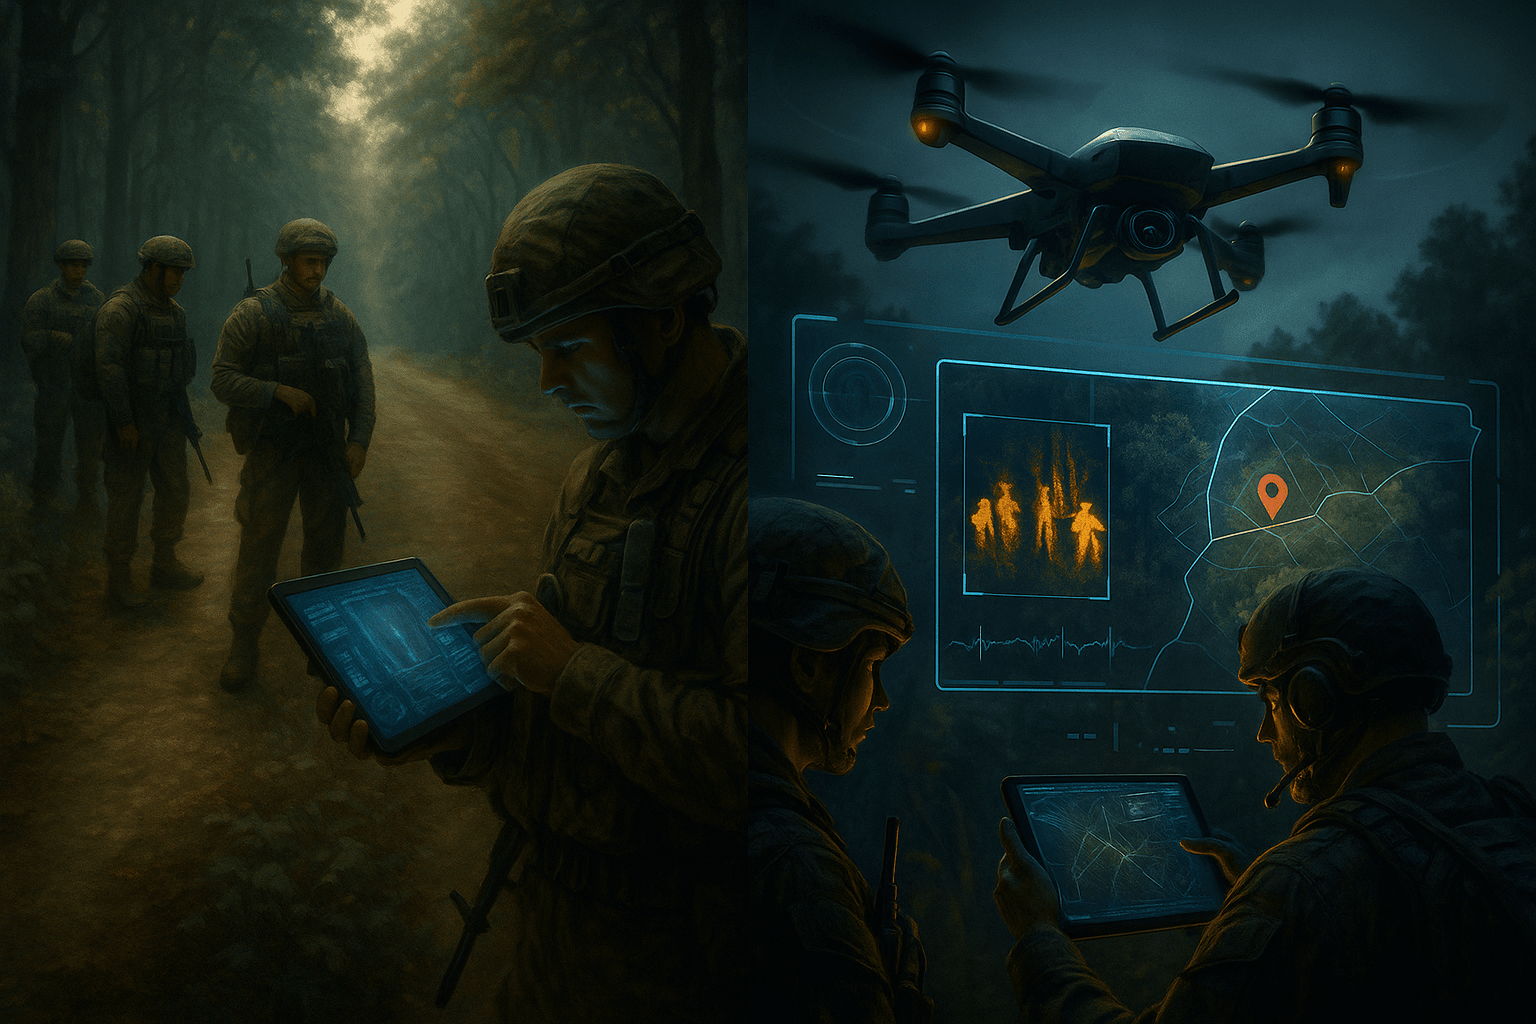
- Small drones. They expand observation and provide near real time targeting updates. Use them to confirm convoy spacing or to detect unexpected escorts just before engagement.
- Electronic warfare. Short, focused EW can blind enemy sensors and disrupt communications. Used sparingly, it becomes another way to secure surprise.
- Remote munitions and IEDs. These add stand-off effects and layering. Increased stand-off requires stricter signature management.
- Open source intelligence. Commercial satellite imagery, social media, and mapping services accelerate planning. Always cross-check digital sources against human reporting to avoid deception.
Contemporary Vignette
A recent pattern shows units combining drone observation with classic concealment to ambush mechanized convoys. A forward observer uses a drone to confirm convoy size and spacing. Teams establish firing sectors that prioritize the convoy center to prevent escape. Initial effects aim at mobility and command nodes. Smoke and decoys facilitate withdrawal along preplanned routes. The engagement disrupts movement, inflicts material damage, and disappears before larger forces can respond.
Concise instruction on point ambush fundamentals — organization, trigger control, and execution — illustrated with practical field considerations. This video complements the doctrinal framework outlined above.
Loading video player…
Case Studies of Success
Below are tightened, sourceable case studies presented in a uniform format. Each entry focuses on context, what happened, the immediate effect, and the operational lesson for readers interested in the history and implications rather than a how-to manual.
1) Blood River Poort, Second Boer War, 1901
Context. Boer commandos waged a protracted campaign of mobility and harassment against a superior British force. The Boers relied on mounted fire teams and intimate knowledge of the veld.
What happened. Boer units identified a narrow valley where a British column habitually transited. They established concealed positions along the flanks and used concentrated fire to disrupt command and block movement.
Effect. The ambush produced heavy British casualties, captured materiel, and a local morale boost for Boer forces. It forced the British to alter routes and divert troops to security duties.
Lesson. Superior local knowledge and mobility let a smaller force impose costs disproportionate to its size. The political and operational impact extended beyond immediate losses because it forced the opponent to consume resources on protection.
2) Ap Bac, South Vietnam, 1963
Context. In early counterinsurgency operations the South Vietnamese army, backed by U.S. advisers and air assets, engaged Viet Cong formations operating in riverine and paddy terrain. Conventional confidence favored air mobility.
What happened. Viet Cong long-term observation and preparation turned the site at Ap Bac into a constrained battlefield. When government forces committed air and mechanized assets, defenders combined concealment with concentrated fires to blunt helicopters and disorganize ground forces.
Effect. The government operation failed to achieve its objectives and suffered reputational and political costs. Ap Bac highlighted limits to relying on technology without matching tactics and local intelligence.
Lesson. Air and technological advantages lose force when an opponent leverages concealment and timing. Doctrine must account for how terrain and patterns of life can neutralize platform advantages. See also: counterinsurgency doctrine and its evolution in response to these failures.
3) Partisan Interdiction During Napoleon’s Retreat, 1812 (Mstislavl Region)
Context. The Grande Armée’s retreat from Moscow exposed severe logistical strain. Russian partisan bands and irregular detachments targeted the French lines of communication.
What happened. Partisans and irregular detachments focused on supply convoys, rear elements, and stragglers along retreat routes. Hit-and-run strikes, combined with environmental hardship, multiplied the attrition.
Effect. Loss of supplies, rising noncombatant casualties, and deteriorating morale accelerated the collapse of the formation. The retreat became catastrophic, not merely difficult.
Lesson. Logistics are the center of gravity for large formations. Small, persistent disruptions against supply lines can translate into strategic collapse over time. This principle of targeting logistical dependency is further explored in our analysis of sabotage in resistance movements.
4) Modern Vignette: Convoy Interdiction Using Unmanned Systems, 2022–2024 (Ukraine Theatre)
Context. Recent conflicts show irregular and regular forces integrating small unmanned aerial systems into reconnaissance and strike cycles. Convoys remain critical vulnerabilities for maneuvering forces.
What happened. Small units used drones for overwatch and pattern confirmation, then executed concentrated fires against mobility nodes. The combination reduced reaction time and increased the chance that interdicted convoys could not reconstitute quickly.
Effect. Local operational pauses, higher logistical risk for the adversary, and increased demands for route security and air cover. The psychological effect of persistent remote observation also shaped movement discipline.
Lesson. The fundamental elements of the ambush endure. New tools change tempo and sensing, but the strategic effect remains the same: degrade freedom of movement and force the opponent to commit resources to protection.
| Case | Force Ratio | Primary Vulnerability Targeted | Strategic Effect |
|---|---|---|---|
| Blood River Poort | Small vs larger column | Movement through constricted terrain | Forced security reallocation, morale effects |
| Ap Bac | Insurgent force vs conventional column | Air-mobile insertion points and exposed infantry | Operational failure of conventional tactics |
| Napoleon retreat | Partisans vs withdrawing army | Logistical convoys and stragglers | Strategic attrition and collapse |
| Modern convoy interdiction | Small, sensor-equipped teams vs mechanized convoys | Mobility nodes and convoy cohesion | Increased logistical costs and operational pauses |
Lessons from Failure
Failures teach more than victories. When an ambush collapses it is rarely because of a single mistake. It is usually the result of a cascade of errors that turn initiative into vulnerability. This section isolates the common failure modes and then examines three historical examples to make the lessons concrete.
Why Ambushes Fail
Common failure drivers:
- Faulty intelligence. Misidentified targets, bad timing estimates, and overreliance on a single source create surprises of the wrong kind.
- Overconfidence. Underestimating the enemy’s awareness or reserves breeds sloppy preparation and weak contingency planning.
- Poor discipline. Breakdown in noise, light, movement, or fire control destroys surprise and causes fratricide.
- Lack of withdrawal planning. No clear exfil routes, no rally points, and no medical plan convert a controlled strike into a rout.
- The ambusher becomes the ambushed. That phrase describes the reversal when defenders react faster than expected, counterattack aggressively, or bring overwhelming firepower to bear.
- Psychological inversion. Fear can flip sides. An ambusher who loses cohesion under pressure becomes as exposed and brittle as the original target.
Failure is rarely a single fault. It is a failure of systems. Intelligence, rehearsals, logistics, command clarity, and medical planning must all work together. If one element is weak the entire mission is at risk.
Case Studies of Failure
These examples keep focus on operational outcomes and lessons rather than technical tradecraft.
Greek ambush near Sakarya, 1921
Context. During the Greco-Turkish campaign Greek forces attempted local actions to disrupt Turkish movement and logistics.
What went wrong. Intelligence underestimated the defending force and its readiness. The Greeks misidentified a vulnerable column and engaged a formation that was stronger and more alert than reported.
Outcome. The ambush collapsed. Greek units suffered heavy casualties and lost local initiative. The error contributed to a broader operational reversal.
Lesson. Validate enemy strength. Never assume a target is weak because it fits an expected pattern.
Che Guevara’s campaign in Bolivia, 1967
Context. Guevara attempted to transplant a Cuban model into Bolivia without the same social and political foundations.
What went wrong. The guerrilla force lacked local support and reliable logistics. Intelligence was incomplete and misleading. The force became isolated.
Outcome. Repeated tactical failures culminated in encirclement, capture, and execution of key leaders. The campaign ended in collapse.
Lesson. Popular support and secure logistics are force multipliers. Without them, even well planned actions become traps. For a deeper analysis of Guevara’s strategic framework and its limitations, see resistance mobilization.
Modern example: failed ambushes against technically superior forces
Context. Across recent conflicts insurgent groups have attempted ambushes against convoys protected by air surveillance and persistent ISR.
What went wrong. Opponents combined wide area sensors, aerial overwatch, and rapid reaction units. Ambushers who relied on dated patterns of life or predictable locations found their windows closed.
Outcome. Ambush attempts were interrupted or countered before execution. Losses mounted. Tactics that succeeded in lower density battlespace failed when facing integrated ISR and quick reaction.
Lesson. Tactics must evolve with the sensor environment. Surprise requires not only concealment but also an understanding of how the enemy senses the battlefield.
Mitigation and Adaptation
Failures point to corrective actions that preserve the ambush as an operational option while reducing risk.
For irregular units
- Diversify intelligence. Use multiple methods and sources to confirm target identity and timing.
- Harden discipline. Small breaches in signature control produce large consequences. Rehearse contingency actions.
- Plan the aftermath. Casualty handling, denial of materiel, and alternate exfil routes are not optional. They are as important as the firing plan.
- Avoid predictable patterns. Rotate approaches and timing to minimize ISR exploitation. Integrate digital security practices to protect communications and planning from interception.
For conventional forces
- Harden mobility nodes. Convoy procedures, route clearance, and layered ISR reduce vulnerability.
- Use deception and unpredictability in movement to deny good targeting data.
- Invest in rapid reaction and medical response so that ambush effects remain local and temporary rather than strategic.
Comparative Analysis: Success and Failure
History shows that ambush outcomes are shaped less by ideology or courage than by preparation and adaptation. The same tactical tool can yield opposite results depending on intelligence quality, local support, and command control. Success and failure are two ends of a single continuum of discipline.
Core Contrasts
| Element | Successful Ambushes | Failed Ambushes |
|---|---|---|
| Intelligence Quality | Multi-source confirmation, continuous observation, integration of local knowledge. | Single-source reliance, misreading of strength or timing. |
| Terrain Use | Kill zones selected to control movement and channel fires. | Poorly chosen ground; attackers exposed or outflanked. |
| Timing and Coordination | Synchronization of fires and withdrawal rehearsed. | Premature initiation, loss of synchronization, or no defined exit. |
| Command Discipline | Short, clear chains of command and practiced signals. | Fragmented leadership and inconsistent control. |
| Local Support and Logistics | Secure resupply, guides, and medical fallback. | Isolation, poor sustainment, and no population support. |
| Psychological Effect | Creates uncertainty and imposes defensive posture on enemy. | Reverses fear; ambushers lose cohesion under counterattack. |
Effective ambushes rely on coherence, a state where intelligence, fieldcraft, and morale reinforce each other. When that coherence erodes, tactical advantage becomes exposure.
The Role of Adaptation
Patterns of failure mirror complacency. Once a technique succeeds repeatedly, commanders are tempted to standardize it. The enemy studies, anticipates, and eventually counters the pattern. Adaptive guerrillas vary timing, composition, and terrain to prevent predictability. They update reconnaissance continuously and change ambush signatures faster than the enemy can adjust defenses.
Conventional forces adapt differently. They turn detection and speed into armor. Convoy hardening, air overwatch, and ISR fusion shift the balance toward defense. The exchange becomes one of sensors against concealment. In this environment, survival depends on how fast each side learns.
Strategic Synthesis
Ambushes embody the paradox of irregular warfare: small tactical events that yield outsized strategic consequences. A string of successful ambushes can fracture logistics networks, exhaust manpower, and erode political will. A single failed one can expose entire networks, forfeit initiative, and collapse local support.
Mao called this the “strategic accumulation of tactical successes.” Giap built on it, coordinating distributed ambushes into a mosaic of attrition that wore down larger armies. Both understood the equation: intelligence plus patience equals control.
The balance of terror created by effective ambushes rarely lasts forever. Every opponent learns. The side that continues learning faster, refining intelligence, adjusting timing, and mastering terrain, keeps the advantage.
Modern Implications for Irregular Warfare
The principles of ambush have not changed, but their execution now extends across physical and digital terrain. The modern battlefield compresses time, exposes signatures, and rewards adaptation. Drones, sensors, and information dominance reshape how surprise is achieved and how it is lost.
The Modern Battlespace
Guerrilla ambushes today occur under near-constant surveillance. Satellites, UAVs, and ground-based sensors erase much of the concealment that earlier fighters relied upon. Surprise now depends on managing signatures rather than avoiding visibility entirely. Fighters must understand how the enemy senses, thermal, acoustic, electromagnetic, and then design ambushes that exploit sensor blind spots or overwhelm analysis with noise.
Technology has expanded both opportunity and risk. Cheap commercial drones offer live reconnaissance once limited to nation-states. Yet the same drones broadcast radio frequencies detectable by electronic support measures. Improvisation still matters, but technical literacy has become a survival skill.
Integration of Unmanned and Electronic Systems
Unmanned systems have turned reconnaissance and fire initiation into a continuous loop. Small drones hover unseen above road networks, marking targets and relaying movement patterns. Ground units can act within minutes rather than hours. This speed magnifies the effect of surprise while reducing exposure time.
Electronic warfare adds a second layer. Jamming and spoofing disrupt GPS signals and communications, fracturing the situational awareness of convoys or patrols. When timed with kinetic fire, these effects multiply confusion. The result is the same outcome achieved by ambushers centuries ago: paralysis of command at the point of contact.
Counter-Ambush Adaptation
Conventional militaries have evolved in response. Persistent ISR overwatch, armored logistics, and rapid reaction elements now accompany most maneuver formations. Artificial intelligence systems process sensor feeds to detect patterns associated with ambush preparation — heat anomalies, clustered movement, or road obstructions. The arms race between detection and deception continues.
Irregular forces that survive are those that shift tactics faster than algorithms can learn. They employ decoys, dummy radio traffic, and false trails. They vary timing, terrain, and technology to preserve unpredictability. Survival now depends as much on data denial as on marksmanship.
Cognitive and Informational Dimensions
The psychological side of ambush remains decisive. The ability to create uncertainty still shapes tempo more than attrition alone. A modern convoy might complete its mission, yet if it halts or reroutes for fear of unseen threats, the ambush has succeeded in strategic terms. Likewise, when disinformation spreads faster than confirmation, a simulated ambush can yield the same operational pause as a real one.
Digital networks have created new forms of ambush within the information domain. Hacked traffic systems, false GPS signals, and fabricated imagery can channel forces into unfavorable positions without a shot fired. The logic is identical to a physical kill zone: lure, isolate, and exploit. Understanding these tactics requires a foundation in both espionage and subversion.
Enduring Truth
The ambush remains a timeless tactic because it speaks to human limits. Technology may amplify perception, but fear, fatigue, and friction persist. The side that best understands those limits — and shapes them through surprise — retains the initiative. Whether in a jungle, a desert highway, or a contested electromagnetic spectrum, the equation is unchanged: preparation, concealment, timing, and discipline decide the outcome.
The Timeless Equalizer
The ambush remains the most enduring expression of irregular warfare. It distills the entire philosophy of guerrilla combat into one event — intelligence, timing, terrain, and control. When executed with discipline, it converts weakness into leverage and restores initiative to the outnumbered. Every generation that fights from disadvantage returns to the ambush because it works.
History shows that each successful campaign of irregular resistance carries the same signature: detailed preparation, patience, and precision. Boer fighters in the veld, Viet Cong units in the paddies, and modern drone teams along contested highways all demonstrate a continuity of thought. They exploit gaps between the enemy’s awareness and his reaction time. That interval, measured in seconds or hours, is where asymmetric power lives.
Modern technology has not erased the ambush. It has transformed its dimensions. Surveillance and data analytics have made concealment more difficult, but they have also created new domains to manipulate. False signals, decoys, and digital misdirection are the ambushes of the information era. The mindset is unchanged: dictate the terms of contact and withdraw before the opponent regains balance.
For professional soldiers and strategists, the lesson is constant. Ambushes do not belong only to guerrillas. They belong to anyone who understands that initiative is a function of preparation, not mass. In every theater, physical, cognitive, or digital, the side that sees first and strikes on its own terms dominates the tempo of conflict.
The ambush endures because surprise is eternal.
Recommended Reading
These titles provide the doctrinal, historical, and operational foundations referenced throughout this article. Each is directly relevant to understanding ambush tactics within the broader context of guerrilla and irregular warfare.
The Guerrilla Tactical Triad
Raid, ambush, recon — the three enduring pillars of irregular warfare distilled into a concise operational reference. Directly covers the ambush doctrine examined in this article.
Buy on Amazon →Masters of Resistance
Mao, T.E. Lawrence, Che Guevara — three volumes covering the strategic thinkers whose doctrines shaped every ambush campaign discussed in this analysis.
Buy on Amazon →Guerrilla Warfare — Che Guevara
Guevara’s operational handbook on guerrilla tactics, including ambush planning, terrain selection, and the relationship between tactical action and revolutionary strategy.
Buy on Amazon →